I finally finished the other pillow that I started. I love the way that it turned out and it looks great in my living room.
Here is how I made it:
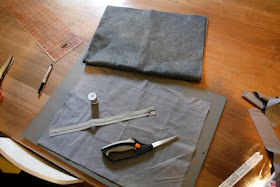
First I measured my pillow and cut out two rectangles out of my gray broadcloth adding a 1/2 inch seam allowance on all sides and an extra inch on the back piece for the zipper.

Next I decided where I wanted my zipper to go (I chose about 1/3 from the top) and cut a straight line across the back piece of broadcloth.

Next I attached the zipper using this tutorial.


Now I set aside the back piece and focused on the front. First I cut out about 1 1/2 yards worth of circles out of my felt (it takes a lot more than you might think). I used the top of a glass for a stencil - mine was about 3 inches in diameter, but yours can be whatever size you want.

Next I folded each circle in half and pressed it to make them stand up and to give a stitching line.

I started randomly placing the circles on the front of my broadcloth and sewing each one in the ditch of the pressed crease. I left about an inch around the edges to assure that I could stitch the front and back together.


Once the pillow front was looking pretty full I stitched the top and one side together at a 1/2 inch seam allowance. I pinned the circles away from the seam allowance first so that I wouldn't get them caught in the stitching (don't worry if you get small bit caught in - it's inevitable and not noticable once the pillow is finished).


Now I can go back and fill in the edges, allowing the circles to overlap the seam line a bit.

Turning it inside out again, I stitched the remaining two edges together and then flipped it right side out through the zipper. Now I was able to fill in the edges of these last two sides.
Lastly, I clipped the many loose strings off, put my thrifted pillow inside, and I was done.
I couldn't be more happy with how this turned out.
front:
 back:
back:

WOWZA!
ReplyDeleteYoua re SO COOL!
That pillow would look way to chic at my house, but for yours it's perfection!
wow, this and the yellow pillow are just awesome. nice job.
ReplyDeleteI love this pillow. Great job. On second thought, I will probably try making this pillow before I try the pleated pillow, but they both turned out so well!
ReplyDeleteThis pillow has the most extraordinary texture. I just want to reach out and touch it! Thanks for sharing :)
ReplyDeleteThis is so cool!! The texture on it reminds me of mineral formations.
ReplyDeleteI posted a link to your tutorial on CraftGossip Sewing:
http://sewing.craftgossip.com/tutorial-throw-pillow-embellished-with-felt-circles/2009/11/08/
--Anne
Wow that's super fantastic.
ReplyDeleteGorgeous! I'm going to try that. Thanks!
ReplyDeleteso beautiful.
ReplyDeleteI LOVE this pillow!
ReplyDeleteThis is really beautiful. Love it! Found you via One Pretty Thing...
ReplyDeleteGorgeous, knew I bought those circle dies for a reason, just didn't know what until now!
ReplyDeleteThat is such a wonderful project. Thank you for the excellent tutorial ~ so beautifully put together. I've always wondered how to put in a zipper, so I'm looking forward to that tutorial as well. I found you through Grosgrain, and am so glad that I did. I look forward to reading more of your blog. Cheers! Jenn @ rookno17.blogspot.com
ReplyDeleteThat is really a cool pillow. Great job and thanks for the tutorial!
ReplyDeleteLooove this idea! I'm definitely thinking I should give it a try.
ReplyDeleteThat is so pretty!
ReplyDeleteLOVE. IT. I'll def. have to do this. Thanks for sharing!
ReplyDeleteKelli, this pillow is amazing. And thank you for the cool tutorial. Really, REALLY cool.
ReplyDeleteI've had a project like this in mind for quite awhile and have just never gotten to it. This is a beautiful pillow! Thanks for the motivation to get mine going.
ReplyDeleteThis is a great idea, and a great tutorial!
ReplyDeleteThere's a whole mess of sewing stuff for sewers like us posted at www.WeAllSew.com
I love it - and it's definitely my style! The design is clever, too - simple colour and fabric but oodles of texture. Fantastic!
ReplyDeleteThis is really beautiful.
ReplyDeletelovely- we'll be linking!
ReplyDeletelove this --
ReplyDeleteamazing pillow!
ReplyDeletewant to try it so bad!
This is BEAUTIFUL!!! I can't wait to make it! Thanks for the great idea!
ReplyDeleteVery artistic! loved the pillow on my to do list.
ReplyDeleteThank you so much for sharing this tutorial.
wow! I Love this pillow so much! Found you on these magical years!
ReplyDeleteI was thinking of doing it with an old pair of jeans... Hope it works! I'll tell you later.
ReplyDeleteI love this fantastic pillow, and can't wait to try to make one of my very own. I like how crowded the circles are to eachother, makes the pattern so full and nice. Do the seam lines of the circles overlap each other?
ReplyDeleteOMG ......... FABULOUS, JUST FABULOUS!!!!!
ReplyDeleteYou are so talented !!!
ReplyDeleteThis is wonderful!
ReplyDeleteEasy to make and beautiful.
ReplyDeleteI love this pillow!! I linked this up on my blog today: http://www.vixenmade.com/2012/05/10-mothers-day-diy-gifts.html
ReplyDeleteGorgeous pillow!!
ReplyDeleteKamagra, the most efficient generic drug for men
ReplyDeleteThis comment has been removed by the author.
ReplyDeletehttp://presserfoot.blogspot.com/2009/11/felt-circle-pillow-done-tutorial.html
ReplyDelete