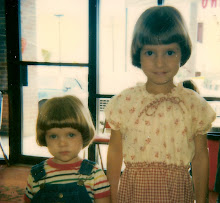
I graduated college in linguistics so I am a firm believer in "a rose by any other name" would not smell so sweet. I think that what we call and the way describe things makes a big difference in the way we perceive things. Every parent of a special needs child knows this love hate relationship. You need the "label" or diagnosis to get help for your child, but you don't want those who help you to see your child as the diagnosis and not look pass the label. In the same, but obviously lesser light, I don't want to think about binding my child down in arm restraints day after day to manage her care, but I can accept the thought of hugging her snuggly with beautiful fabric to give her the love and care that I need to.
This is a quick and easy project, suitable for beginner sewers. The Snug Hug could also be used to swaddle newborns underneath beautiful blankets or anything else you might dream up. Let's get started.
The Snug Hug
Materials1/2 yard of medium to heavy weight fabric
21 inches of sew-able Velcro
thread
scissors
Step 1
Measure the circumference of your child where you want the Snug Hug to fit. Make sure your are measuring them as they would fit in it with their arms down at their side. Add 8 inches to that measurement, this allows for future growth.
Step 2
Cut your fabric, folded lengthwise in half, with the measurement from Step 1 by 8 inches down (folded) or 16 inches open. Maaike's fabric was 32 inches by 8 inches (folded)
Step 3
With right sides together sew your long rectangle around the 3 open sides with a half inch seem allowance, leaving a 3 inch opening at one end. Clip off the seam allowance at the corners.
Step 4
Pulling your fabric through the 3 inch opening, turn you fabric right side out and iron it.
Step 5
Top stitch the 4 sides of your fabric at 1/4 inch seam allowance, this will close up your 3 inch opening.
Step 6
Cut a 6 inch strip of the fuzzy side of the velcro and sew it to one end of your fabric so that it lays vertically on your rectangle. I used the "blind hem stitch" but you could use a straight stitch or zigzag or almost any stitch.
Step 7
Flip your fabric over so that you cannot see the velcro you just sewed and lay two 10 inch strips of the tacky side of the velcro on the opposite side and end as the fuzzy velcro. These two strips will lay horizontally on the rectangle. Now sew them in place
Step 8
Roll up your Snug Hug how you wish to store it to test where you will place your last 2 inches of tacky-sided velcro to maintain closure and sew it in place.
Ready for hugging.


While I know nothing of arm restraints for cleaning a trach, when my daughter was a newborn she was extremely fussy all day long (like colic 20 hours a day) and was only happy to be swaddled so tightly that it made others cringe to see us wrap her up. But she loved it and it made her and therefore us happy and relieved. If I hadn't been so tired back then, I should have come up with a velcro system like this for her...then she might not have gotten out of the swaddle so often...
ReplyDeleteLove the name! I used to work in an eye clinic and the snug hug would be perfect for parents who have to change contact lenses in their young children (who had congenital cataracts)/for children being treated with patching to equalize the vision in their two eyes.
ReplyDeleteJust a quick note to let you know that a link to this post will be placed on CraftCrave today [28 Apr 01:00am GMT]. Thanks, Maria
ReplyDeletehttps://saglamproxy.com
ReplyDeletemetin2 proxy
proxy satın al
knight online proxy
mobil proxy satın al
HOFSZ
Woah! I'm really enjoying the template/theme of this blog. D.
ReplyDeleteIt's simple, yet effective. D.
ReplyDeleteI must say you have done a awesome job with this. D.
ReplyDeleteIn addition, the blog loads extremely fast for me on Internet explorer. D.
ReplyDelete
ReplyDeleteI am regular visitor, how are you everybody?D.
I really appreciate this blog, It means a lot for me,, Very interesting Thanks!!... MM
ReplyDeleteI appreciate this blog of yours. Post more good contents please, Thank you... MM
ReplyDeleteIts an Amazing website, really enjoy this articles. Keep doing this in future.. MM
ReplyDeleteI have joined your feed and look forward to see more of this magnificent blog, thanks... MM
ReplyDeleteI am really happy that you writing content article like this. its greattt Thanksss... MM
ReplyDelete