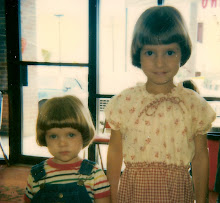
 The first skirt I ever made was in the 6th grade. I was making a full twirly skirt to wear to church. I have no idea why but I was making it out of a red and cream striped denim. I can remember being so excited laying my fabric out on the floor and smoothing it to perfection. Then I just slapped the pattern on and cut it. Not a good idea. I'm sure there were grain-line arrows on the pattern, but I paid them no mind. I never did wear that skirt to church. The swish was non existent, it more of wrapped in between my legs. And the great, ever so slimming, red stripe went in two different directions, never vertical.
Yes, those arrows are there for a reason and if you want a perfect swish and beautiful hang on your maxi here is how to do it:
Step 1. lay your pattern on your smoothed out fabric and measure the distance from the arrow to your salvage edge, pinning it in place.
Step 2. going down to the opposite end of the arrow, adjust your pattern until the distance from the arrow and your salvage edge is exactly the same as the other side, and pin. Now you can pin the rest of your pattern piece with swishing confidence.

Now the grain-line arrow should run exactly parallel to the selvage or finished edge. Remember that with this pattern you will be cutting 3 skirt pieces, so make sure that you have your graphic running in the same direction on all 3! I still do love a good swish.
What about you? Any good grain-line errors to share?


I wouldn't say this is a grainline error but definatly a nap mistake. I was probably 14 and figuring out how to sew without guidance. I had no idea what directional fabric or nap meant. I wore my brand new jumper that I was so proud of to church and learned very quickly what those terms meant. Someone had stopped me in the hall and asked if I knew that my "houses were upside down." I never wore the jumper again and have never made a directional fabric mistake again. Good lesson!
ReplyDeleteYour technique makes so much sense!! I will be doing it your way from now on. (My way was FAR less exact, involving my getting eye-level with the fabric and trying to compare the direction of the threads with the direction of the arrow.)
ReplyDeleteI posted a link to your tutorial on Craft Gossip Sewing:
http://sewing.craftgossip.com/tutorial-aligning-your-pattern-pieces-with-the-grain/2009/09/19/
--Anne
Oh the horrors! The dress that wrapped when it wasn't supposed too, the shirt that had the design upside down AND right side up, the velvety nap going up AND down.
ReplyDelete