Showing posts with label headband. Show all posts

11.20.2009

Jessica's fourth headband and a little bird


My last headband for the week is my favorite...I have been wanting to try this combination of fabrics for a while, and this seemed like the perfect opportunity.
I used the same technique as for the reversible headband {link--http://presserfoot.blogspot.com/2009/11/reversible-headbands-tutorial.html}. The band is made up of a cotton print on one side and a bias-cut scrap of a sweater, which I interfaced for stability, on the other. I made the ties out of the print fabric, and then added my favorite part, the little pink birdie!
I scanned a scrap of the print into the computer and then enlarged it so that the bird was about 2" x 1.5". Then, I cut him out of a felted sweater scrap that I'd fused (with Steam-a-Seam) to some more of the printed cotton. A bead eye and a little bit of stitching later...


and this sweet little headband is complete.

Did I mention that it's my favorite of all?

However, it's wee-person-sized, and my wee person is a boy...so I'm giving it away! Head over to my blog {link--
http://justgiveitago.blogspot.com/2009/11/my-first-giveaway.html} to enter to win it (plus a couple of other little goodies).

What fun it's been to blog in this space this week...many thanks to Kelli & Rian for having me. Happy headbanding!

11.19.2009

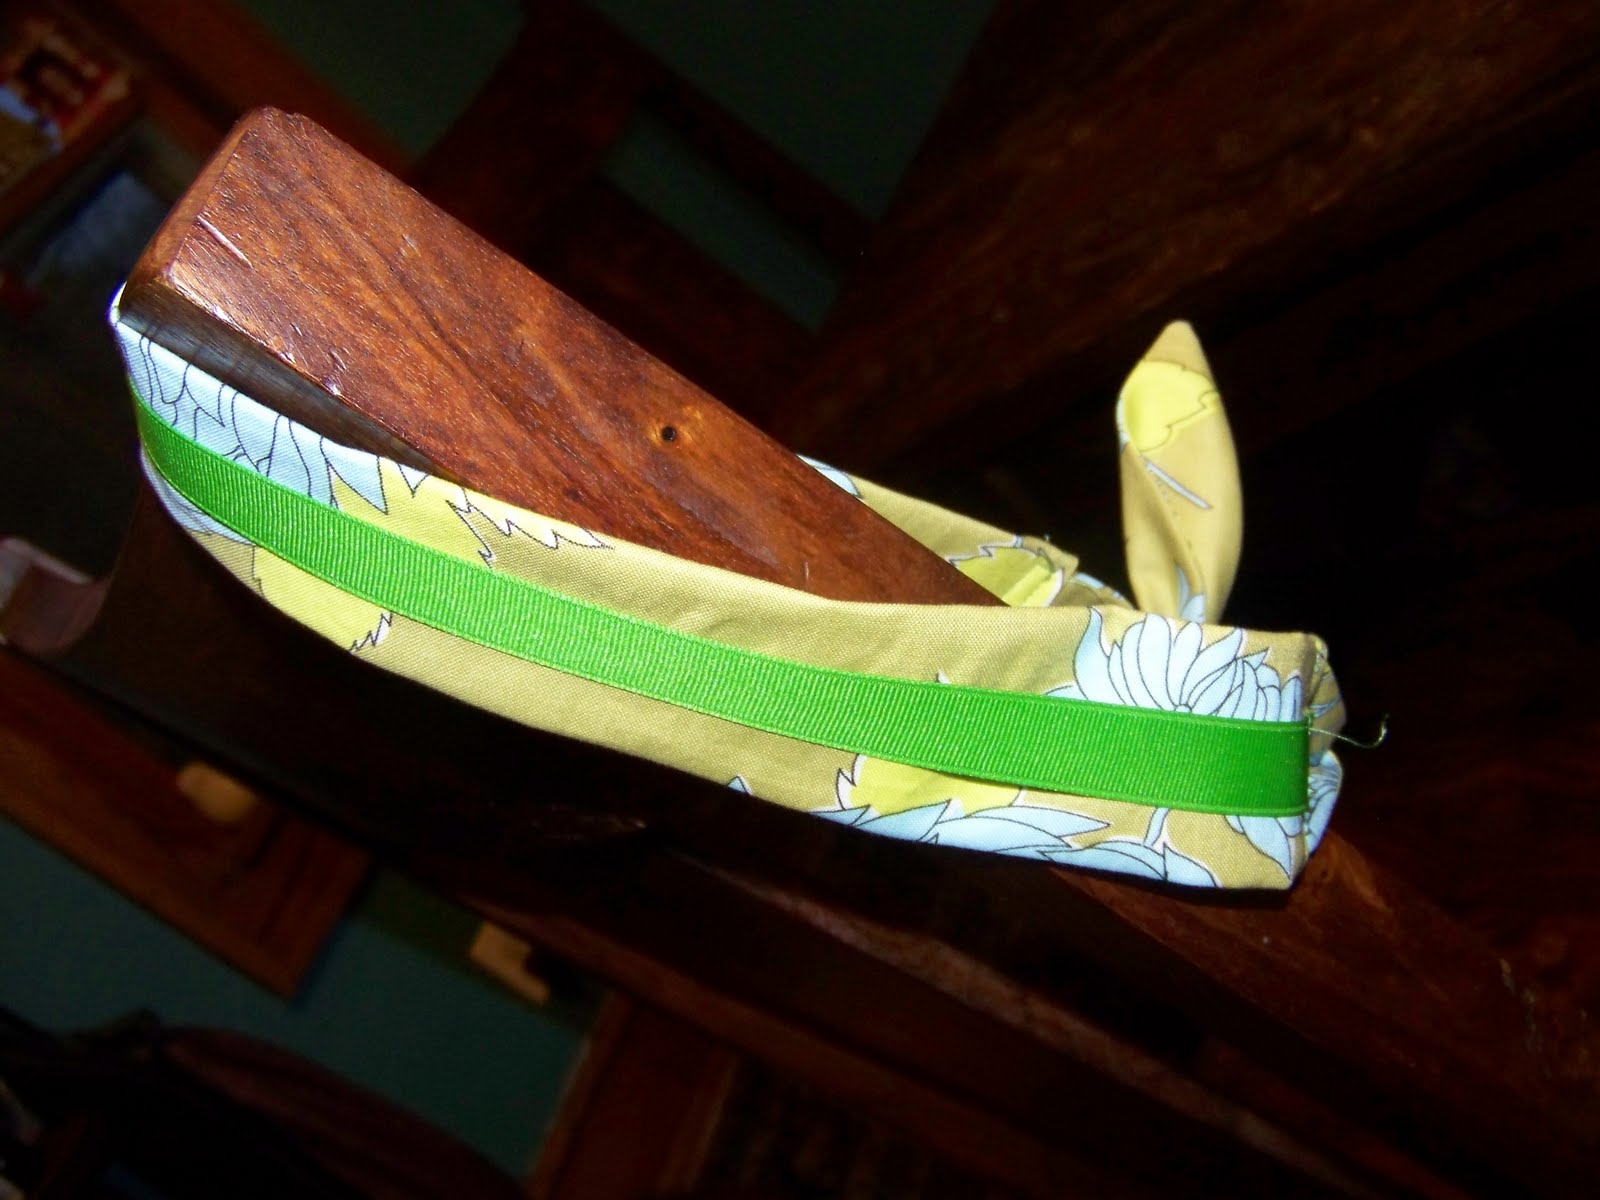
Jessica's third headband - adding ribbon


For the second fabric Rian and Kelli sent, I decided to add a ribbon for two reasons--first, the print is great, but I needed something to cool off the colors...and second, who doesn't love a ribbon?

Easy, easy--just cut ribbon to the same length as the band:

and sew them together, centering the ribbon on the fabric.

Finish as in the pattern.

Done!

On to something even more fun...headbands for the holidays! Of course you can give one (or a few!) on their own, but why not...

make a few different hair accessories and give them all together:

hair elastic w/ button from Lenny DaVinci
pinwheel bobby pin from Little Jenny Wren
fabric covered barrette from Angry Chicken

or give them complete with a spot for organizing:

hanging frame for bows, etc.
from Little Birdie Secrets--switch out the glass for cork and add some hooks for headbands, etc.

or make one, buy one:

feather headbands
by KAANG on etsy--gorgeous.

or how about a headband along with a salon gift card...

all dressed up!

Remember my scraps from the first headband? I certainly didn't want them to go to waste...check out my tutorial at Give It a Go.

Tomorrow, last but not least...a sweet headband for kiddos, and a giveaway!

11.18.2009

reversible headbands tutorial


Making the headband reversible turned out to be really easy...just a couple of adjustments and an extra scrap of fabric were all it took.

When you choose your fabrics, it's important that they coordinate, since you'll be able to see both of them on the ties no matter which end is showing on the band.

For the band, cut one 2 1/4" by 18" rectangle of each fabric. Sew them together along both long sides, leaving the short ends open as in the original pattern. Unless your seams are perfectly straight (mine never are!), you'll be able to see some of the bottom fabric wrapping around to the top. So, as you press, take care (I used a knitting needle) to coax the edges straight as you move the iron over the band. Since the seams show on this version, you may prefer to topstitch along each long edge for a more polished finish.

For the ties, cut two pieces from each fabric, and sew one of each together as in the original pattern.

Sewing the elastic in is the only (sort of!) tricky part. In the original pattern, the elastic goes between the bottom and the tie, like this,

so it doesn't show while you're wearing it.

To accommodate the reversibility, you'll need to place the elastic a little differently and it will therefore be slightly exposed, so it needs a casing. This part is so simple--it took me ten minutes, tops. Start by cutting a piece of fabric double the width of your elastic plus 3/8 of an inch, and an inch and half longer than your elastic (mine was 1 3/8" by 5 1/2" for 1/2" elastic).

Fold and press lengthwise, and sew with a very scant 1/4" (closer to 1/8") seam.

Use a safety pin to turn the casing right side out (it's pretty tight, but it'll work, I promise). Press it, then use the safety pin to insert the elastic into the casing. The fit should be fairly snug. Once you reach the other end, sew the elastic flush with the casing edge:

Then, repeat on the other side.

Now you're ready to sew the elastic and ties into the headband. Sew the first side as in the original pattern. Then, flip one side of the headband over so that each print is showing on one end, and insert and pin the elastic and tie:

You'll want to take a second to check and make sure that the elastic won't be twisted when you wear the headband (ask me how I know!):

You can see that one tie is above the elastic and the other is below--this is what you're going for.

When you wear it, an inch or so of the elastic will show on one end, but since it's covered, it won't be noticeable.

Your finished headband will look like this--two for the price of one!

Tomorrow, embellishing your headband, plus some fun gift ideas (with an extra tutorial!).

11.17.2009

Jessica's first headband- step by step


First thing--I'm crazy about this headband.

Not to get into a huge personal saga when we've only just met, but I don't love my hair. I usually think hair accessories are great on other people, but can't figure out how to make them look normal on myself. This one, though, I finished, photographed, and wore to the grocery store without a speck of self-consciousness.

It came together pretty quickly, with just a couple of hiccups. I didn't time myself, but even with some "frustrations" with my printer and then with the bobbin, I'd guess it only took me about a half an hour to make. The pattern is well written and the diagrams are very clear.

A couple of tips if (when!) you decide to make your own:

The pattern calls for an eighth of a yard of fabric. Rian and Kelli sent me a full eighth, but it was a very tight fit:

I ended up having to shift that tie over even a little bit more, and the second one still scooted off the edge a bit (I compensated by sewing a scant 1/4" seam along that side). It all worked out OK, but if you're buying fabric for this project and would rather have a little more wiggle room than I did...
you might want to splurge on a quarter yard.

When I trimmed the seam allowances at the points of the ties...

I went a little too far--be careful to leave a bit of fabric so you don't end up with this:

At least it was fixable; I just re-sewed a new point a little farther from the edge.

I was most nervous about putting in the elastic. Again, the directions are clear, but I was afraid of everything shifting around before I could get it all sewn together.

It actually worked fine with only one pin, and I have to say that this elastic-under-the-ties concept is ingenious. I'd suggest shortening the elastic just a little more than you think you should...I ended up redoing it, and it could probably stand to be a little tighter still.

The highlight of this project should probably be that I think it's adorable, or that it didn't slip off my head (isn't that so annoying!?), or that both my husband and son noticed it ("Did you finish your headband, Mommy? It's pretty!"), but honestly, it's that I finally had a reason to photograph myself in the mirror.

Next up: Can I make a reversible version?

10.28.2009

November giveaway/guestblogger #2


Here is our second giveaway for our month of small handmade gifts -Heather Bailey's Headband


use this:


to make this:


What you get:

1/8 yard of 2 amy butler fabrics

(enough fabric to make two headbands)

What you do for us:

Make the headbands and post about the process and any other sewing tips as our guestblogger during the week of November 15th.

If you want to enter this giveaway just leave a comment on this post telling us who you are making this gift for (even if it is yourself). It closes Friday at midnight.

p.s. don't forget about our other giveaway going on for week#1!